


These little yarn nests make a great craft for Spring. Build your nest a day ahead of time for the glue to dry. And have scrambled eggs for
breakfast so you don’t waste the food! Inspiration for this craft came from No Time for Flashcards a wonderful resource for children’s
crafts and activities
Materials:
Yarn, Glue, Balloon, Eggs, Toothpick, Blue Paint
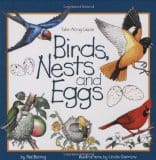
Suggest Resources for a Unit Study:


Art Project Tutorial:

Step 1
Build Your Nest: Since we learned in the book above that robin’s use mud to help their nest stick together, we mixed glue with some brown paint to make our mud.

Step 2
Blow up your balloon, and place into a bowl. The larger the balloon, the larger the nest…..just remember it takes more yarn, more glue, and more time to make big nests. Begin by dipping your pieces of yarn into the “mud” and layering them on the balloon.

Step 3
Get the yarn nice and “muddy” to ensure that it will stick together. You don’t want large piles or a bunch of yard that isn’t glued on. Set this on a counter to dry at least overnight. Ours was large for two days.

Step 4
While your nest is drying, you can get started on the robin’s eggs. To do this you can use your toothpick and poke a hole at either end of the egg. hole, and blow out the egg into a dish.

Step 5
Mix your paint to make robin’s egg blue. We used Crayola Washable paints. We mixed together blue, green and white and came up with a very pretty color for the eggs.

Step 6
Use your paintbrush to paint the eggs. Don’t worry about the holes, just paint over them, and set your eggs in a carton to dry.

All Done!
After your nest is dry, pop the balloon and remove it carefully from the nest. Place your eggs inside, and keep this on your table for spring!

Leave a Reply